Getting Started
Welcome to the Gencove Base docs!
For Gencove Explorer analysis cloud documentation, see here.
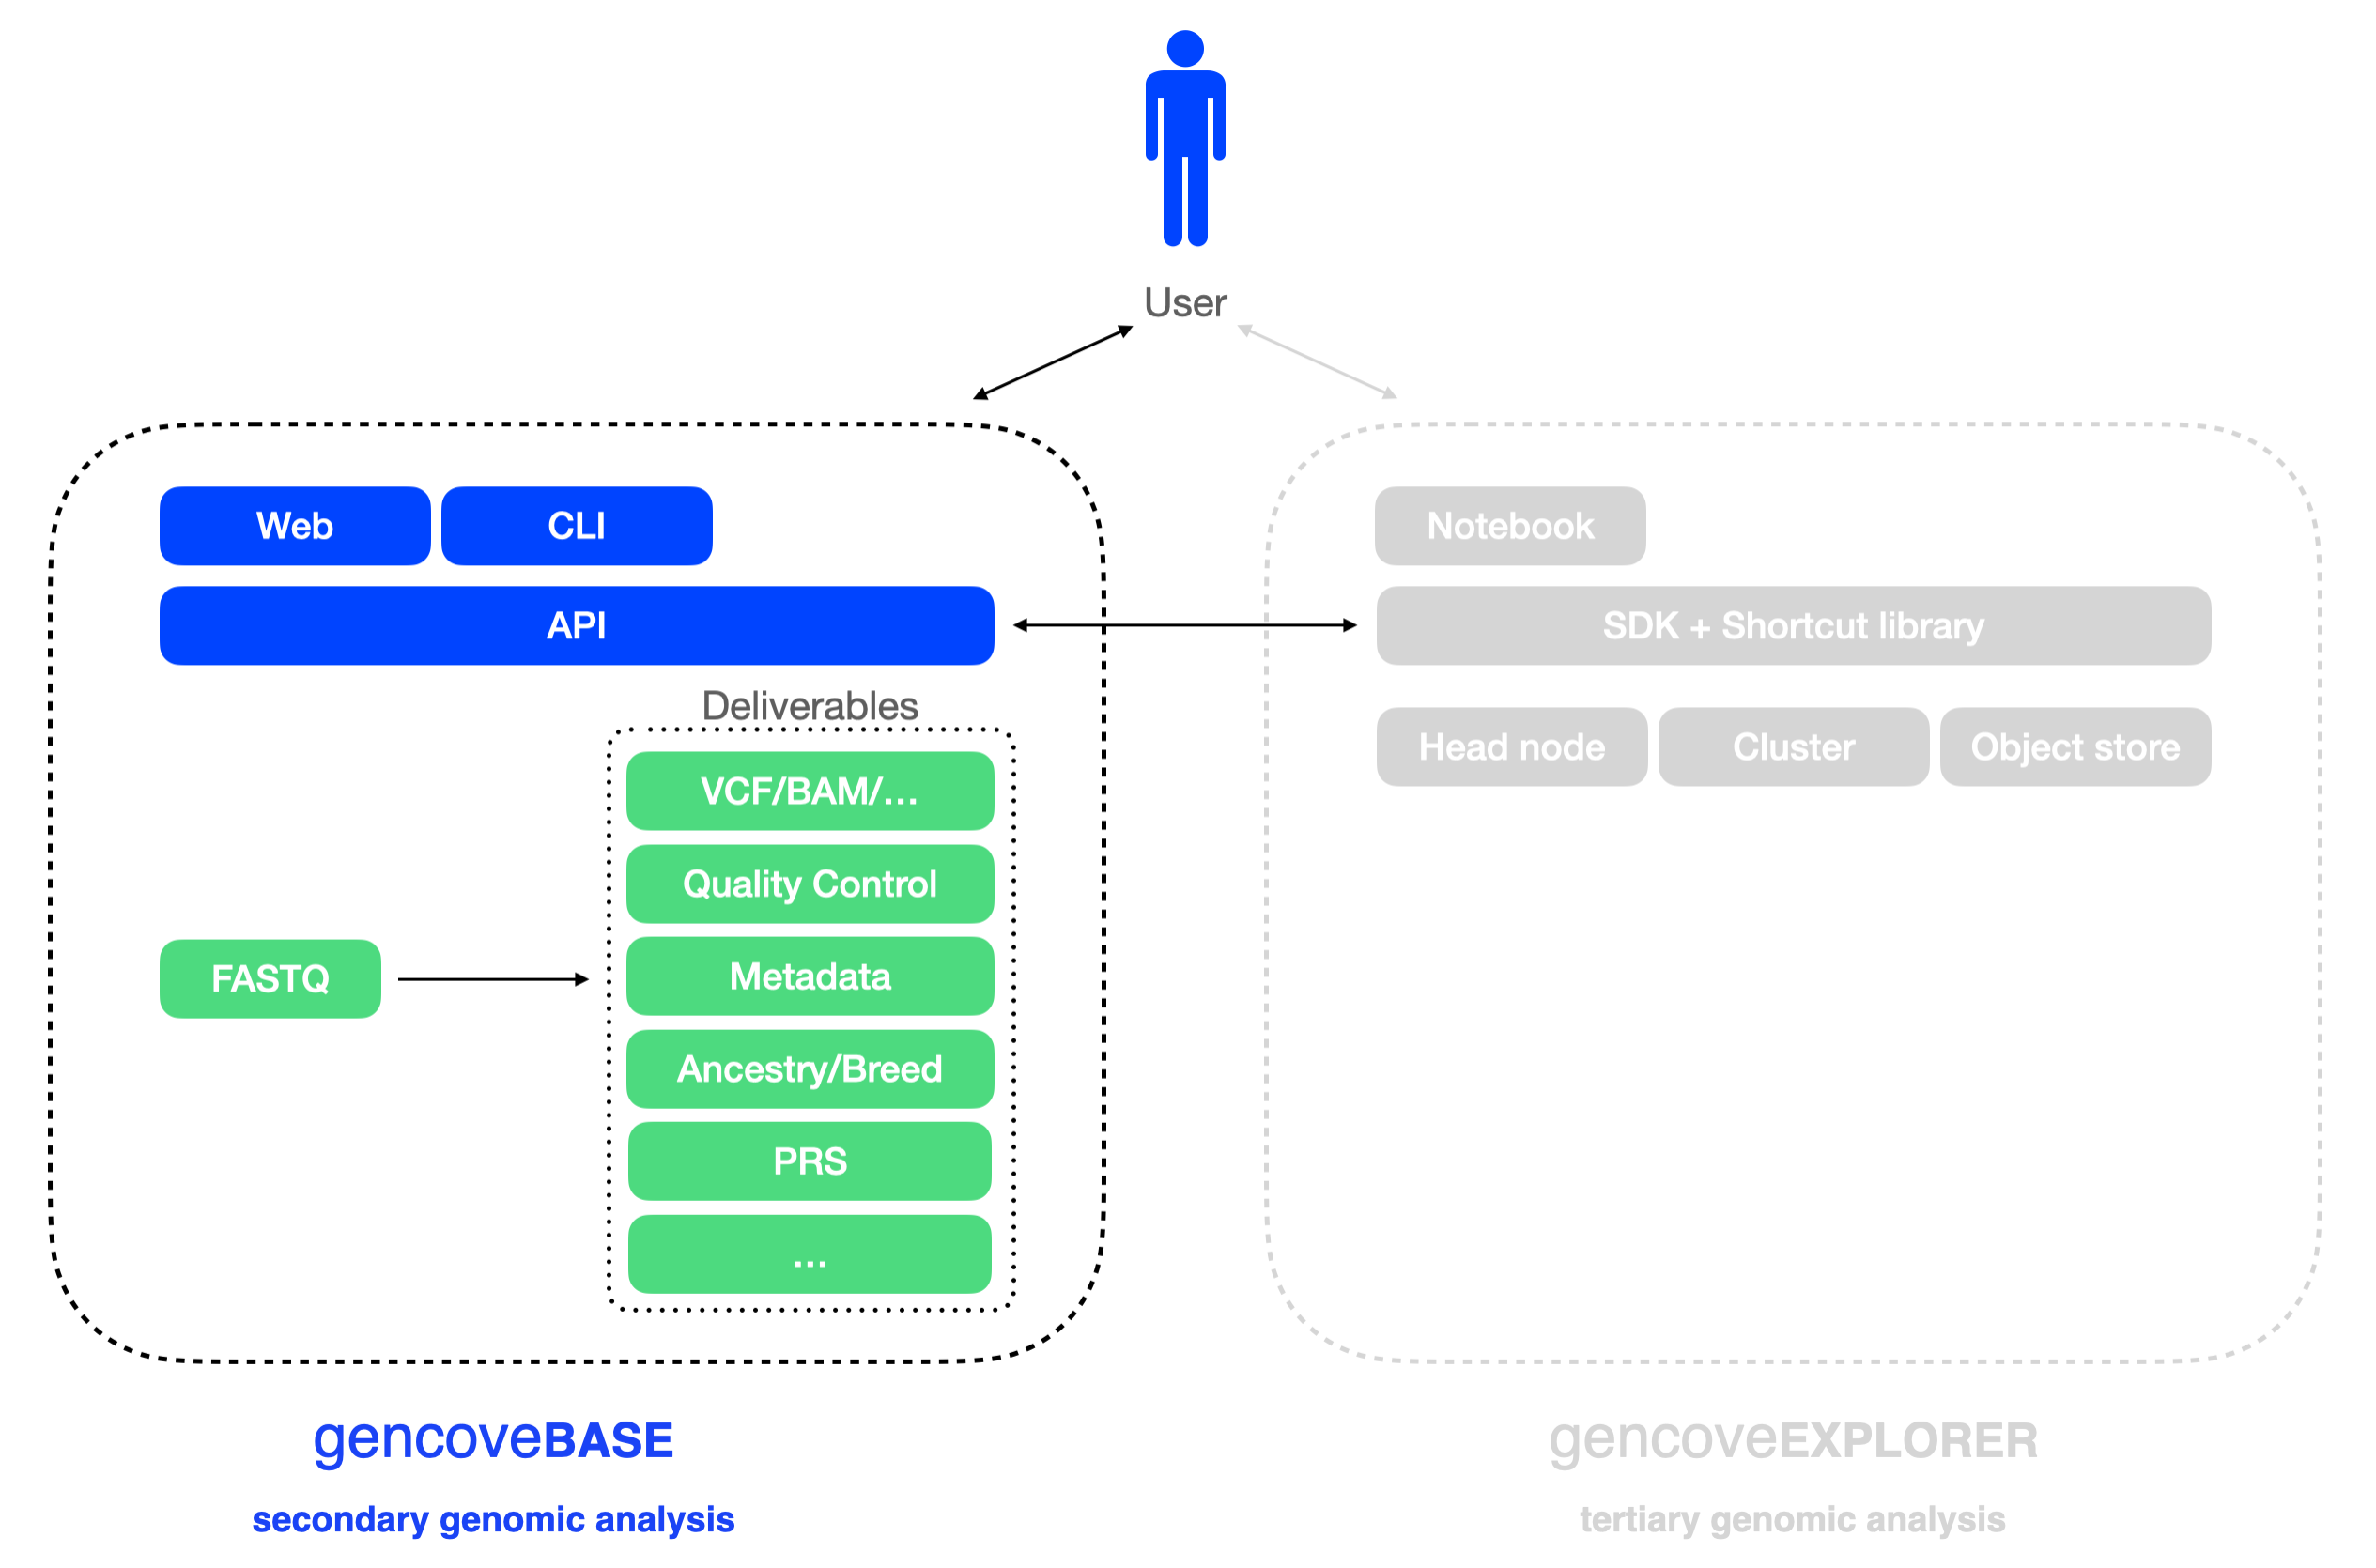
Gencove Base makes it easy to:
- upload low-pass sequencing FASTQ files to the Gencove analysis pipeline
- download analysis results
- track sample status
- automate data delivery.
Read on to get started and try out the examples on the side along the way.
Gencove data
Genomic data is organized into "projects". Each project contains "samples".
Each sample has an id (generated by Gencove) and client_id
(provided to Gencove by clients).
In most cases, a user account and project will be created for you by our team.
In case you would like to explore the Gencove data delivery dashboard, feel free to create an account and explore as follows:
- Create a free Gencove account using the dashboard
- Create a project by going to My Projects -> Add new project
Quickstart
Install the Gencove CLI using the Python package manager pip
and upload files to your Gencove account.
Alternatively, if you have uv available on your system, you can invoke uvx to easily use the Gencove CLI. This will bypass the need for creating a virtual environment or for installing Python on your system.
For more detailed installation instructions, please see the Installation section below.
Video demo
Setup
Installation
Note
Gencove CLI is compatible with Python versions 3.8 and above. Please note that Python 3.7 has reached its end of life, and we highly recommend upgrading to a supported version.
The Gencove CLI can be installed using the Python package manager pip.
The source code is mirrored to a public repository on
GitHub.
Python 3 and pip are commonly available on many operating systems. In case you do need to install Python 3, straightforward instructions are available here.
In production environments, we highly recommend using virtualenv and/or virtualenvwrapper for installing the Gencove CLI in a dedicated Python environment.
Configuring the CLI host
The Gencove platform is deployed across several geographical locations to accommodate users across the world. When using the CLI, the --host option can be configured to point to an alternative environment. Users can find their respective environment by checking the URL used to access the web UI, which follows the format web.<env>.gencove.com.
For example, if you are using the EU environment, you must configure your CLI commands as follows:
To upload a directory to Gencove on the EU host:
Mac OS notes
Due to a known issue with Python that ships
with Mac OS, the Gencove CLI should be installed in the user's home directory (not
system-wide) as follows: pip install --user gencove. Make sure to have ~/bin present
in your $PATH environment variable.
For advanced users, we highly recommend virtualenvwrapper and installing the Gencove CLI within a dedicated virtualenv.
If you absolutely must install the Gencove CLI system-wide using sudo, the following
command can be used as a last resort: sudo pip install gencove --ignore-installed six.
Configuration
Your credentials can be provided to the Gencove CLI via environment variables:
$GENCOVE_API_KEY- API keys can be generated and revoked using the Gencove Dashboard under Account Settings -> API Keys
$GENCOVE_EMAILand$GENCOVE_PASSWORD
Please note that you cannot use $GENCOVE_EMAIL+$GENCOVE_PASSWORD and
$GENCOVE_API_KEY at the same time.
API keys can also be used to authenticate with the API directly by setting the
Authorization HTTP header to Api-Key <your-api-key>.
Note
If MFA (multi-factor authentication) is enabled in the account and you use email and password credentials, an MFA token will be requested in the terminal after the command is submitted.
If an API key is used instead, no other token is necessary.