Uploading using S3
S3 Integration Guide
You must grant Gencove permission to access your AWS account in which it will be able to list and read objects from S3 buckets. Gencove uses a cross-account role with external ID enabled.
You can perform this integration only once per Gencove user. If you need to use multiple AWS accounts you can create more Gencove users and set up S3 integration for each one.
Via S3 you can upload both CRAM and FASTQ files. This is the only method to upload and do analysis on CRAM files at the moment.
Step 1: Configure your Gencove account
- Login to your Gencove account and go to the uploads page.
- Click the S3 tab.
- Click Connect to Amazon S3 and follow the instructions.
- Copy the AWS Account ID, it is needed for the next step.
- Generate a new External ID and copy it, you will need it for the next step.

Step 2: Create a cross-account role and an access policy on AWS
- In the AWS Console, go to the IAM service.
- Click the Roles tab in the sidebar.
-
Click Create role.
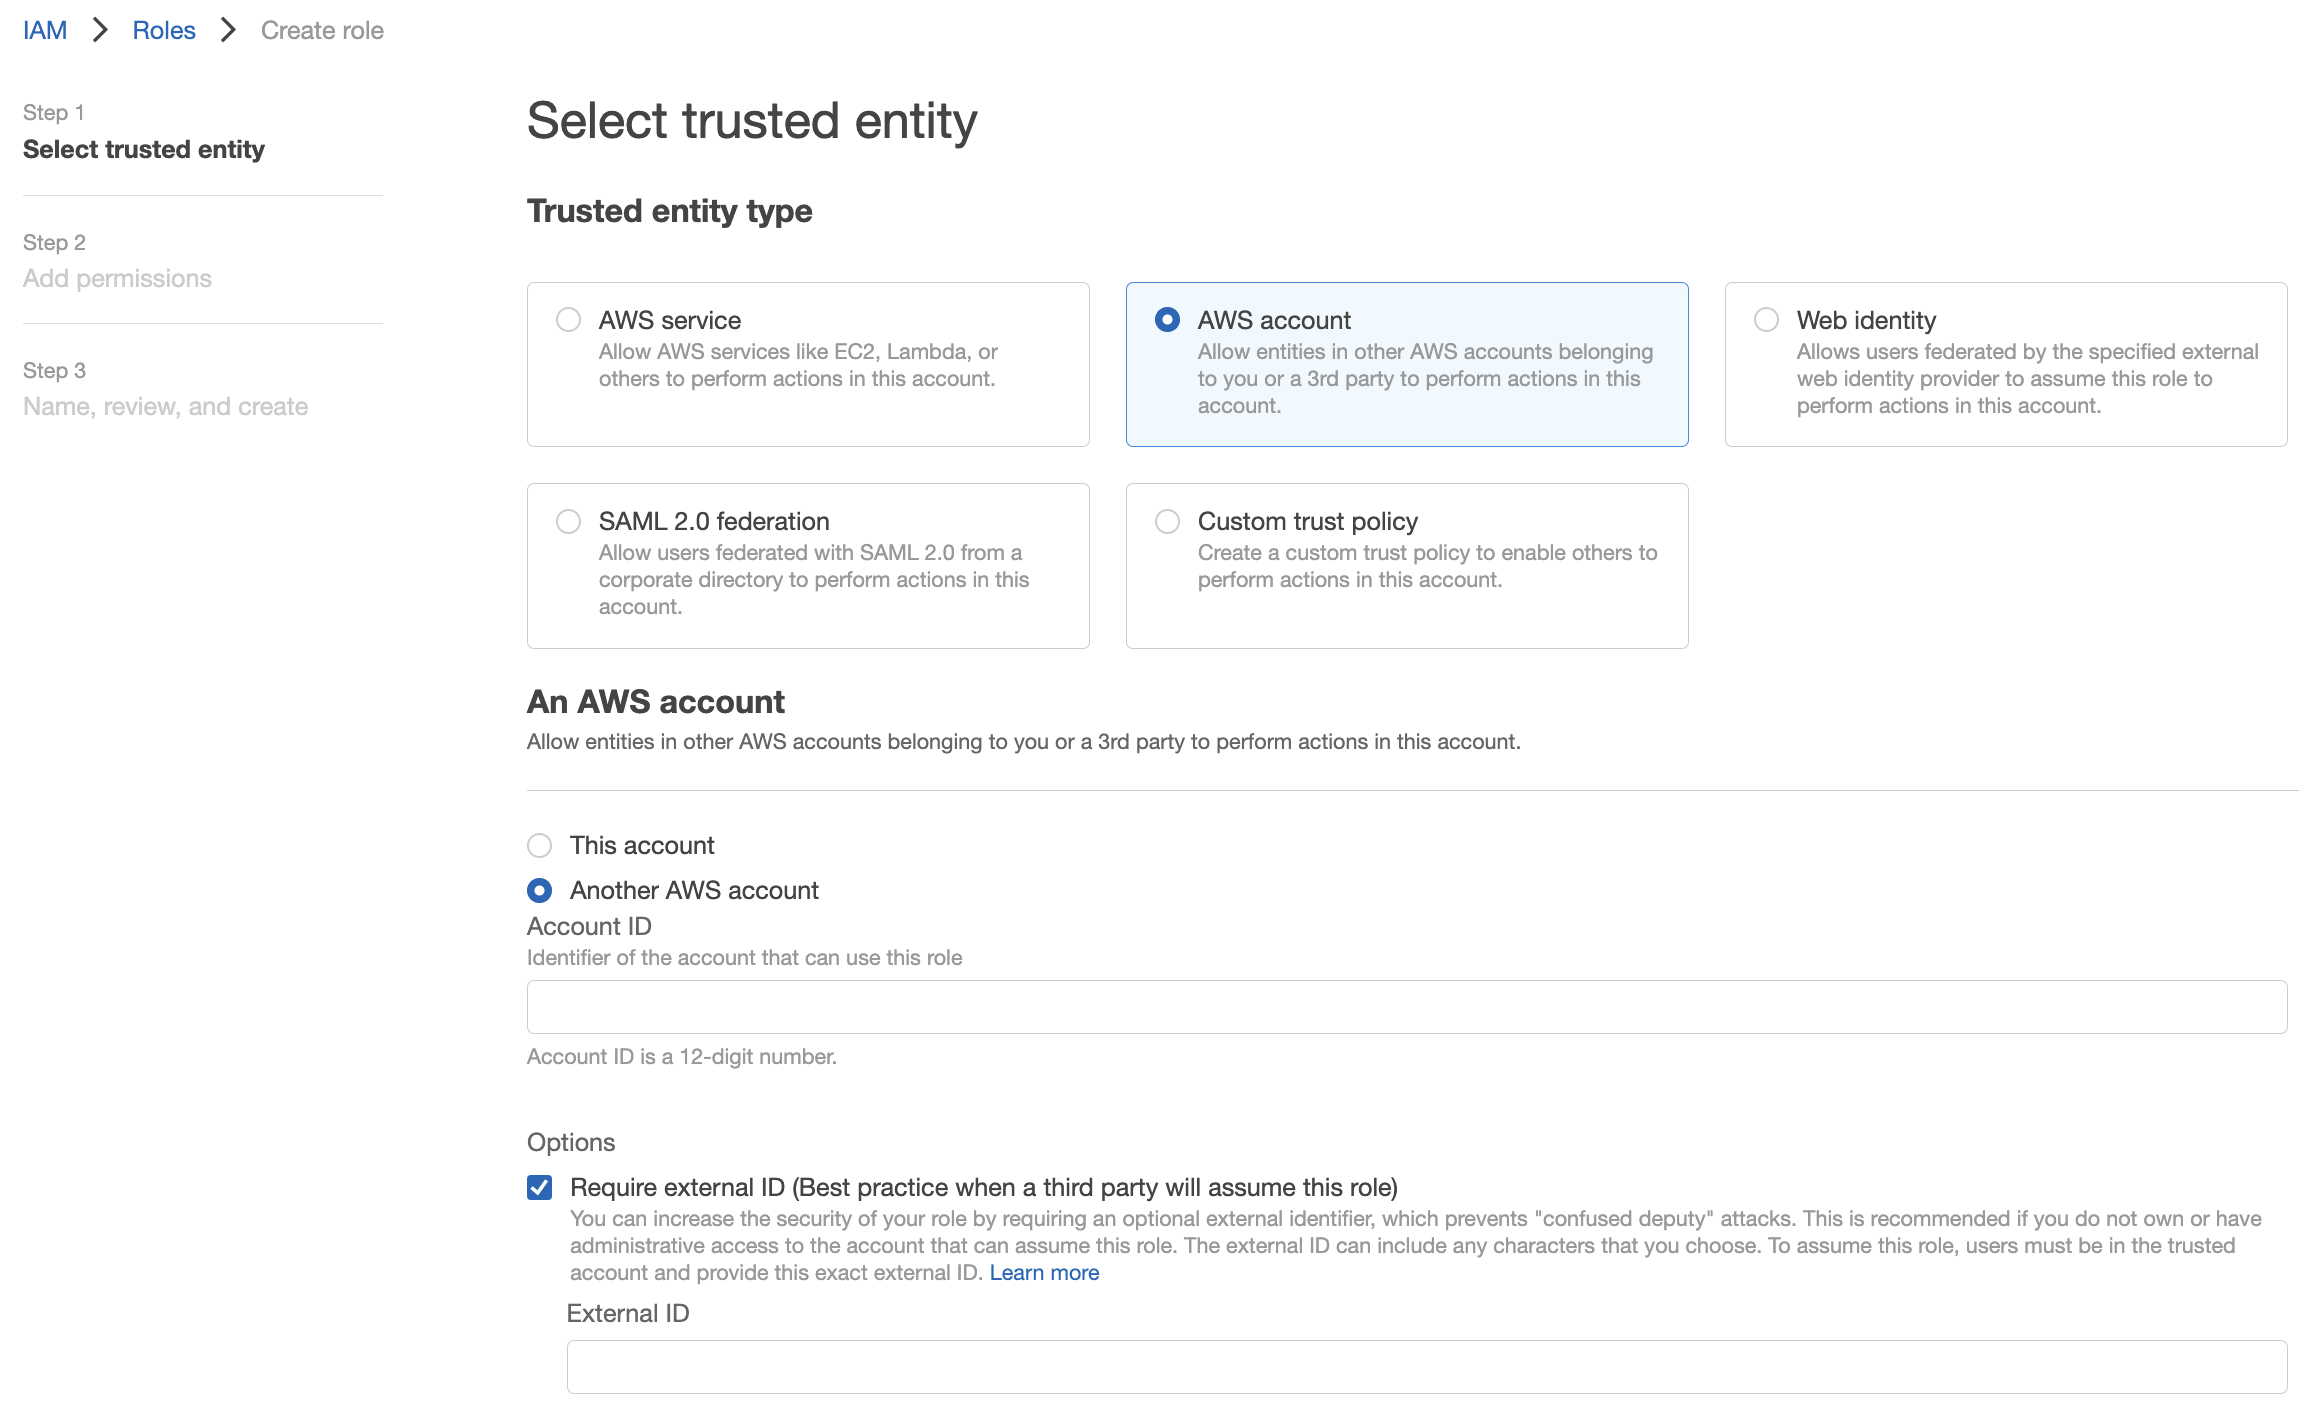
- In Select type of trusted entity, click the Another AWS account tile.
- In the Account ID field, enter the Gencove account ID from Step 1
-
Paste the External ID generated in Step 1 into the corresponding field.
-
Then click on Next to set permissions.
- Create a custom policy using the template below. Click the JSON tab, paste the template and replace "${BucketName}" with the name of the bucket you want to give access to.
-
Click on Next to set the Role name.
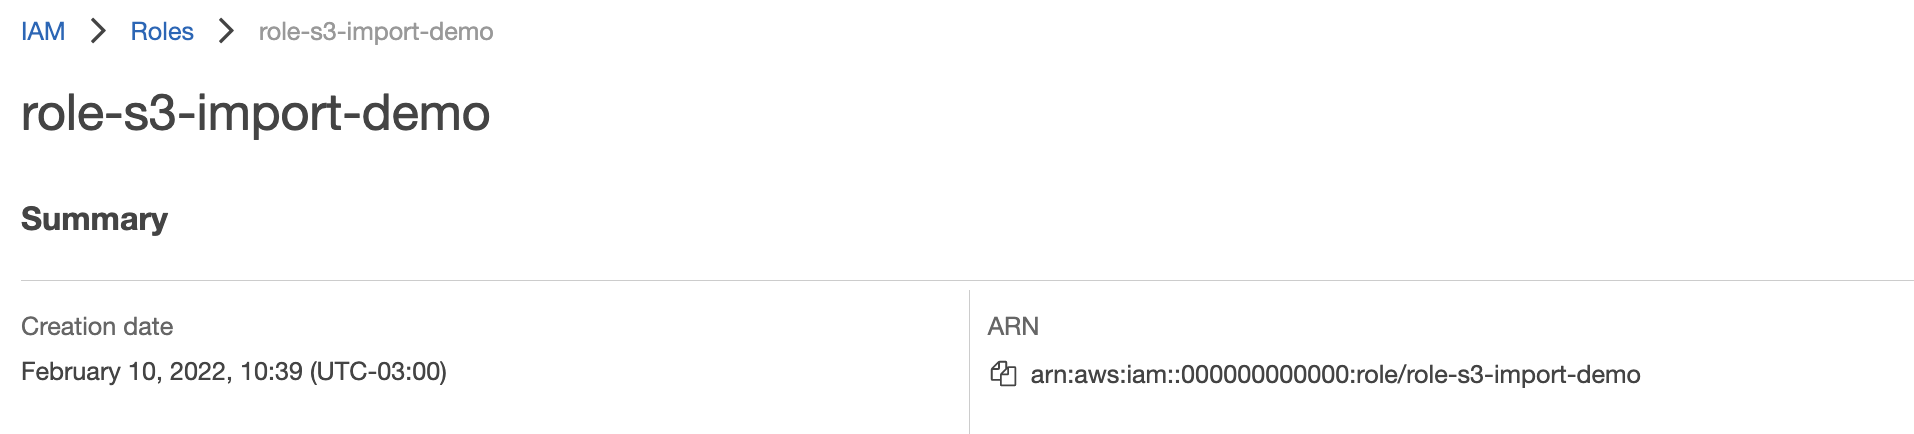
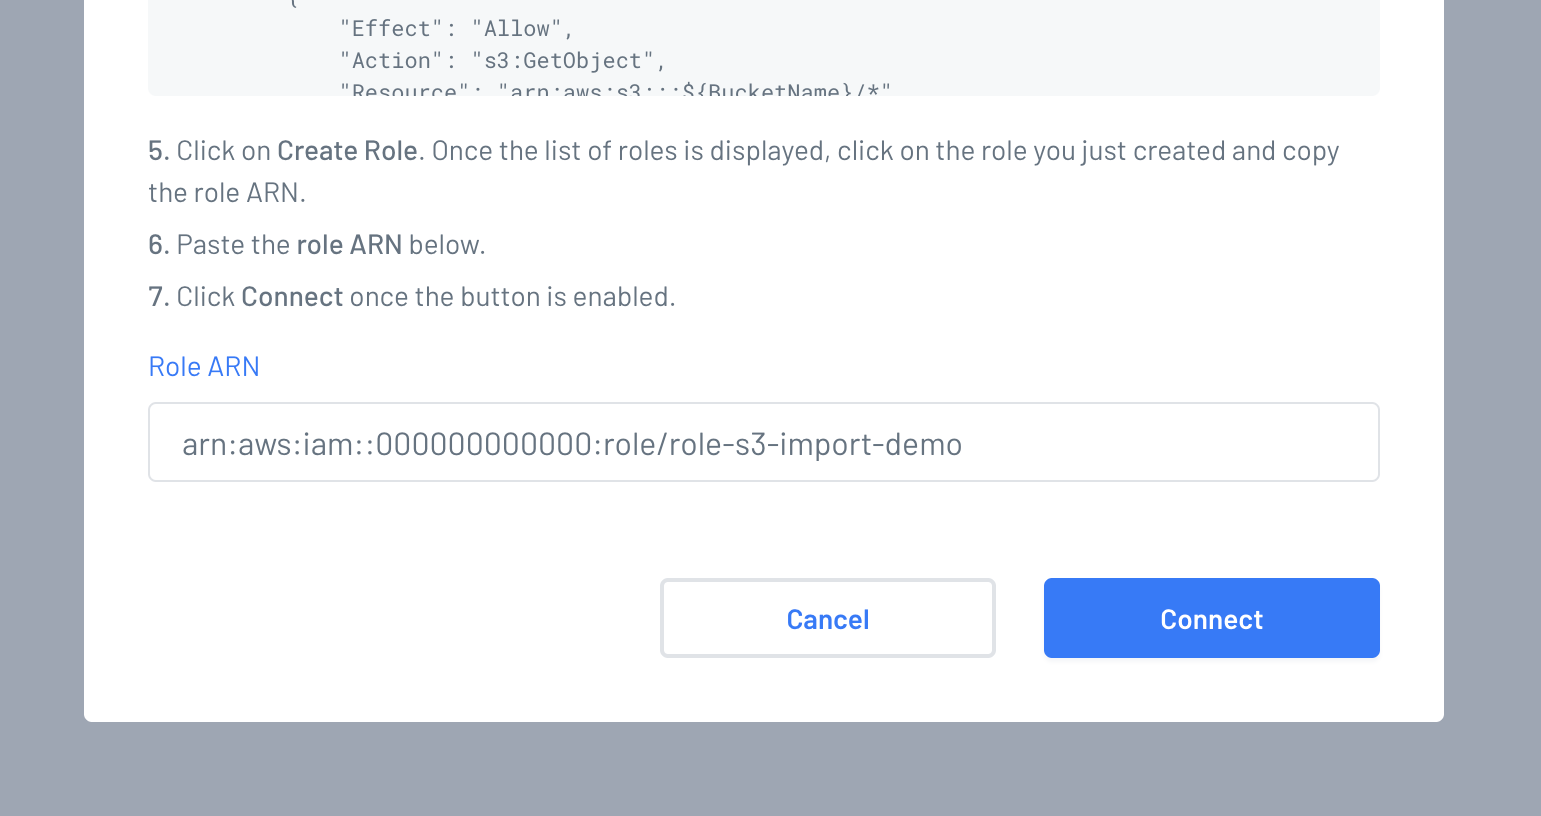
- Click on Create Role. Then the list of roles is displayed, click on the role you just created and copy the role ARN. It takes some time for AWS to propagate changes, it could take a couple minutes until the role is ready to be used, we recommend waiting at least 5 minutes before continuing.
-
Go to Roles list and select the role you created.
Copy Role ARN
-
Go back to your Gencove fastqs S3 configuration page and paste the role ARN in the corresponding field and click "Connect".
Step 3: Import samples from S3
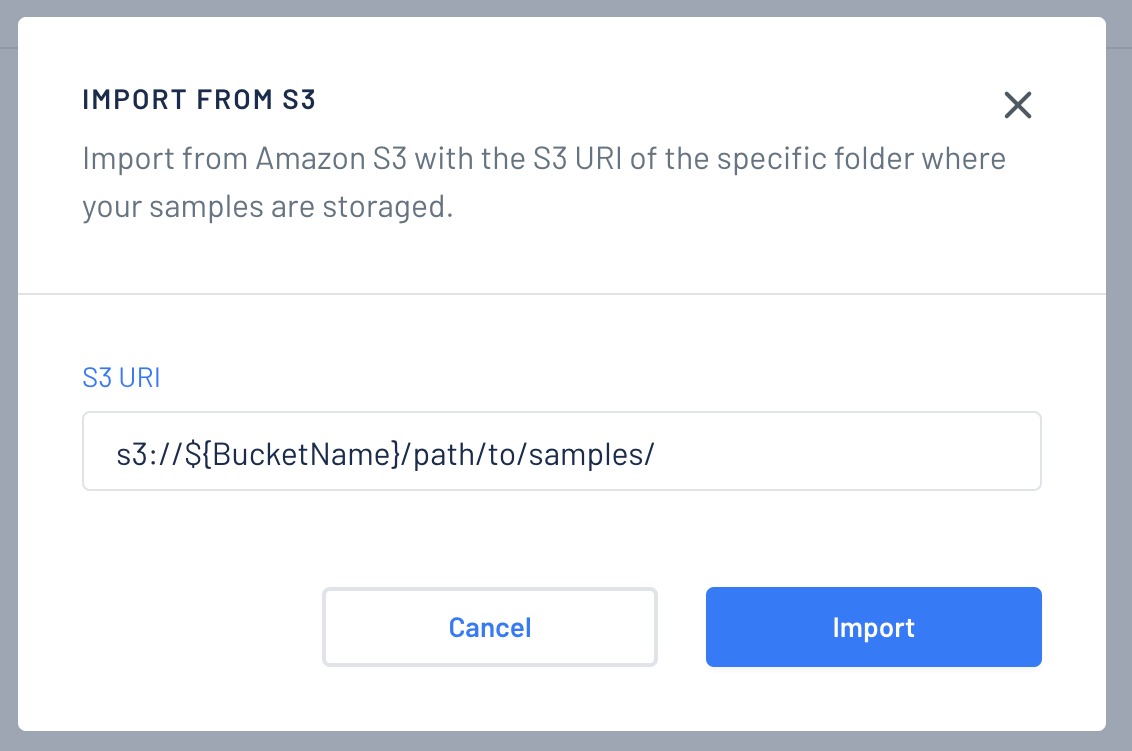
- Login to your Gencove account and go to the uploads page.
- Click the S3 tab.
-
Click "Import from S3" and paste the S3 uri that you want to import, then click "Import".
-
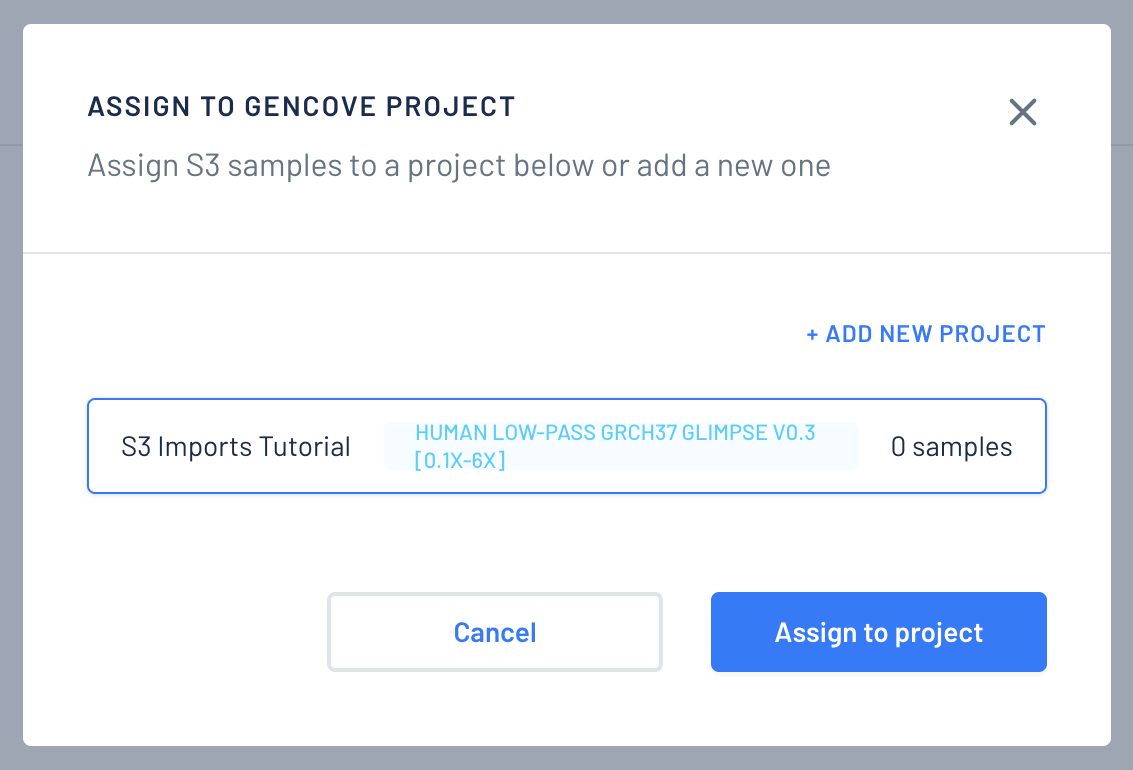
Choose a project to assign the imported samples.
-
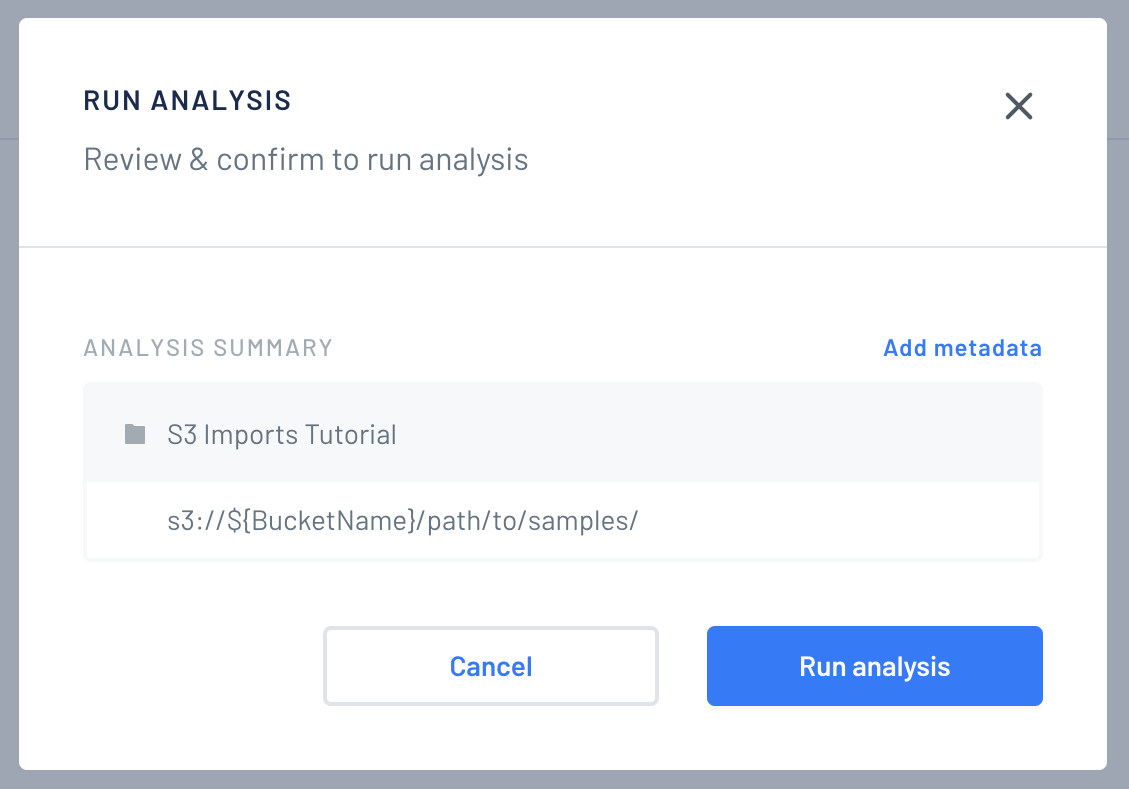
Finally you will see an overview. At this point you can assign metadata to the samples. Also you can select the format of the input: Autodetect, FASTQ or CRAM. By default "autodetect" is selected and checks wether the S3 prefix has CRAMs or FASTQs and proceeds accordingly. When you're done, click "Run analysis".
CRAM Imports. Index files should be included with your files, example:
sample1.cramandsample1.cram.crai(index) should both be present.
-
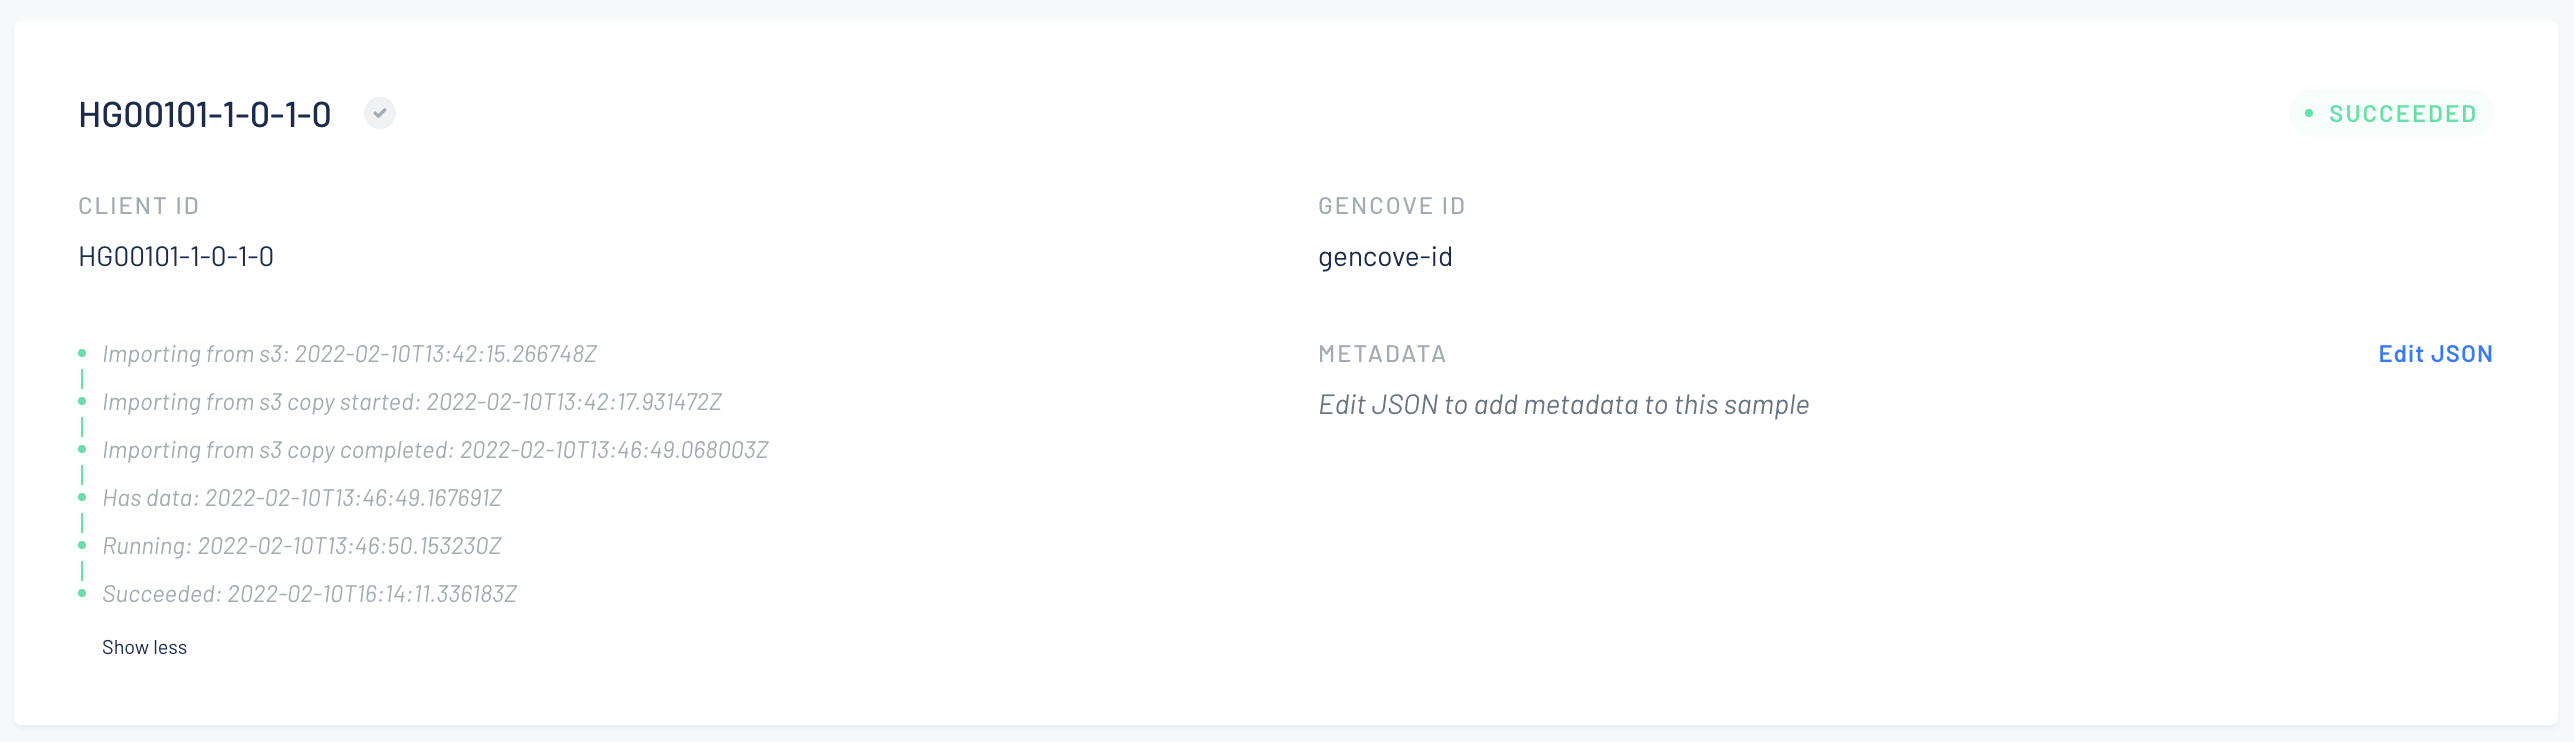
You will be redirected to the project page and you will find the new samples there in importing state.

-
After the sample is imported it will be sent to analysis.
Import from S3 using the CLI
After you completed Step 2 of the integration guide you can opt for using the CLI to start an import from S3 instead of using the Web interface.
Import CRAMs
$ gencove s3 import s3://bucket/path/to/crams/ 06a5d04b-526a-4471-83ba-fb54e0941758 --input-format=cram
Import FASTQs
$ gencove s3 import s3://bucket/path/to/fastqs/ 06a5d04b-526a-4471-83ba-fb54e0941758 --input-format=fastq
Automatic Imports
To enable automatic imports you must have an active S3 Integration and you need to have the Gencove CLI installed.
How automatic imports work
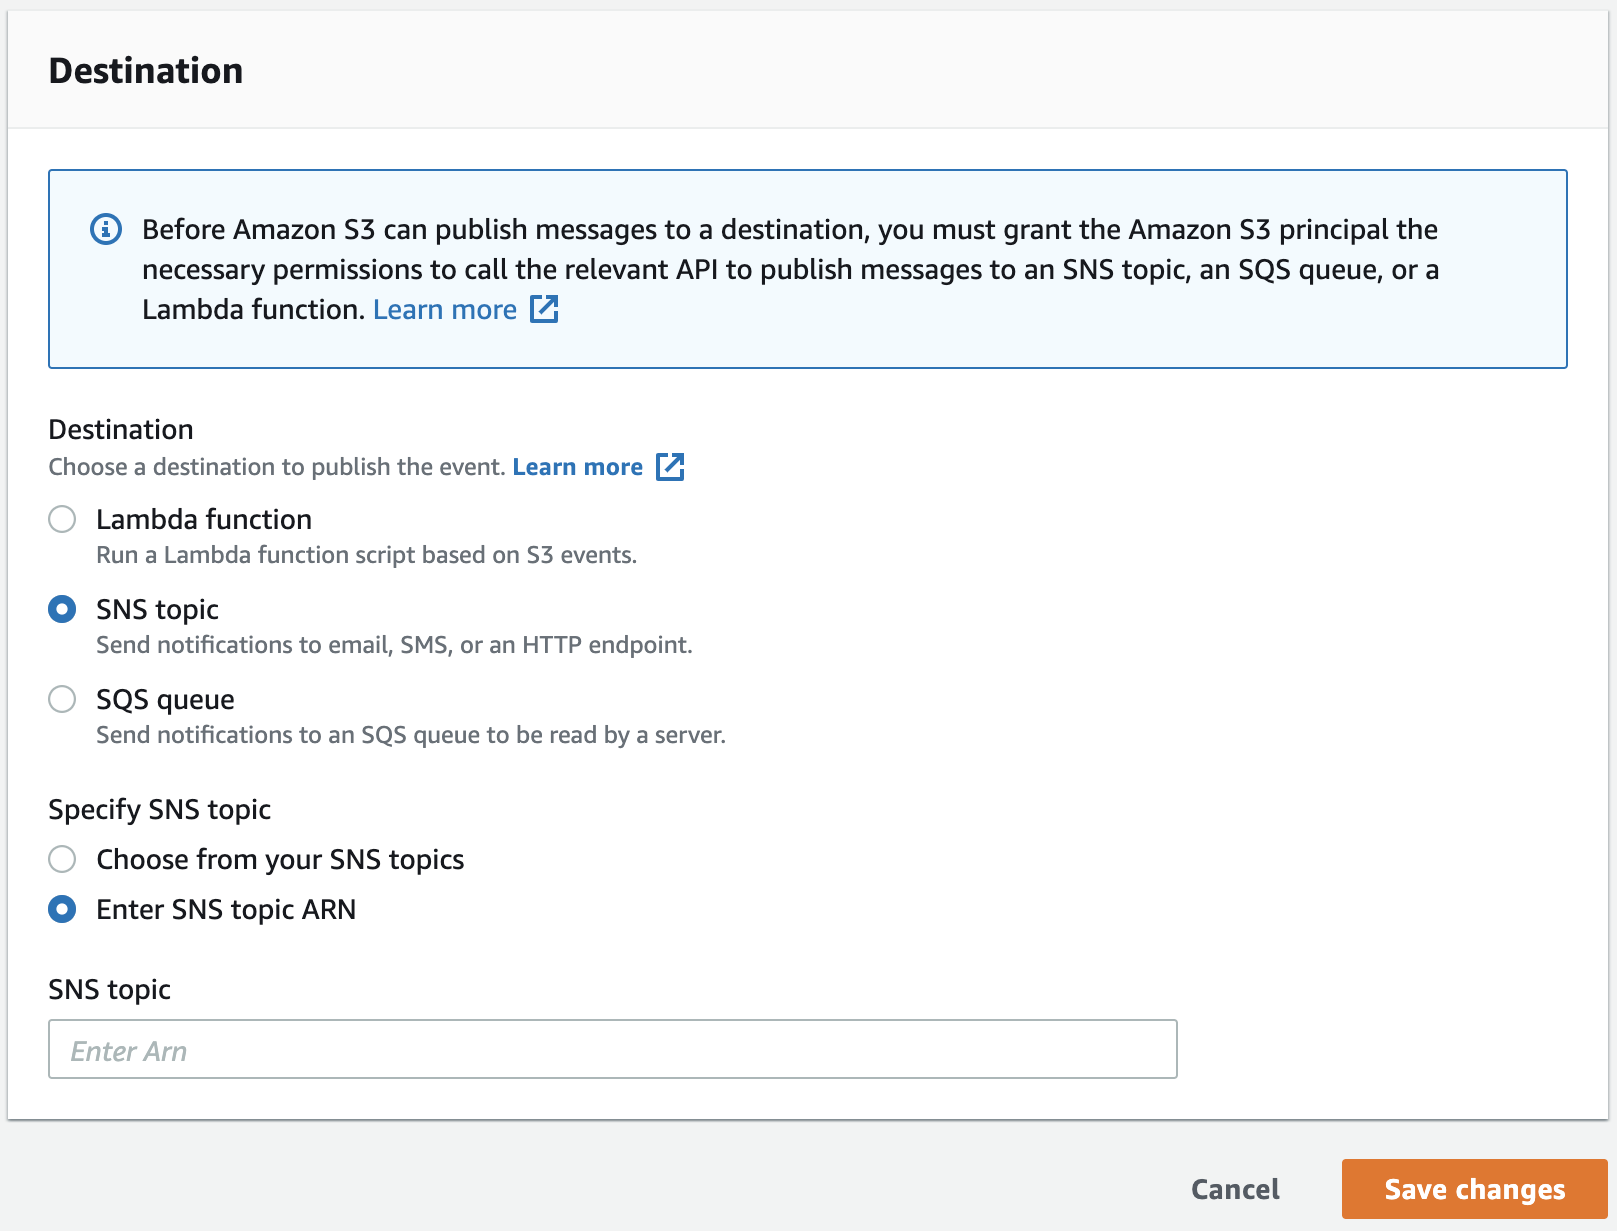
For automatic imports to work you need to setup events in your S3 buckets, ObjectCreated events must be sent to a SNS Topic provided by Gencove. You will then upload files to a specific folder on S3 and when you're finished you need to create an empty file called done inside that folder. Gencove systems will receive a notification that you're done uploading files and will automatically import the entire folder to a given Gencove Project. A given folder will only be processed once, and you can't reuse it after you uploaded a done file for the first time.
There is a main difference between how BaseSpace and S3 automatic imports work. For BaseSpace, when an autoimport job is created Gencove systems do a scan searching for projects created in the last day. But for S3 no initial scan is done and Gencove systems only waits for events of done files being uploaded after a S3 autoimport is created.
Step 1: Create import Job
Using the CLI execute the following command:
Where <gencove-project-id> is the uuid of the gencove project you want the samples to be imported and <s3-uri> is the path where the fastq files are going to be uploaded, for example: s3://bucket-name/human/project-A/.
That command will give you the autoimport id and the Topic ARN.
Step 2: Setup S3 Events
For security reasons we only process event that are triggered by the AWS account id used in Step 2 of the S3 integration guide.
- Go to your S3 AWS Console.
- Select the desired bucket.
- Click on the "Properties" tab.
- Scroll down to "Event notifications" and click "Create event notification".
- Type an "Event name" like
Automatic Import to Gencove Project Aa "Prefix" likehuman/project-A/and "Suffix" =done.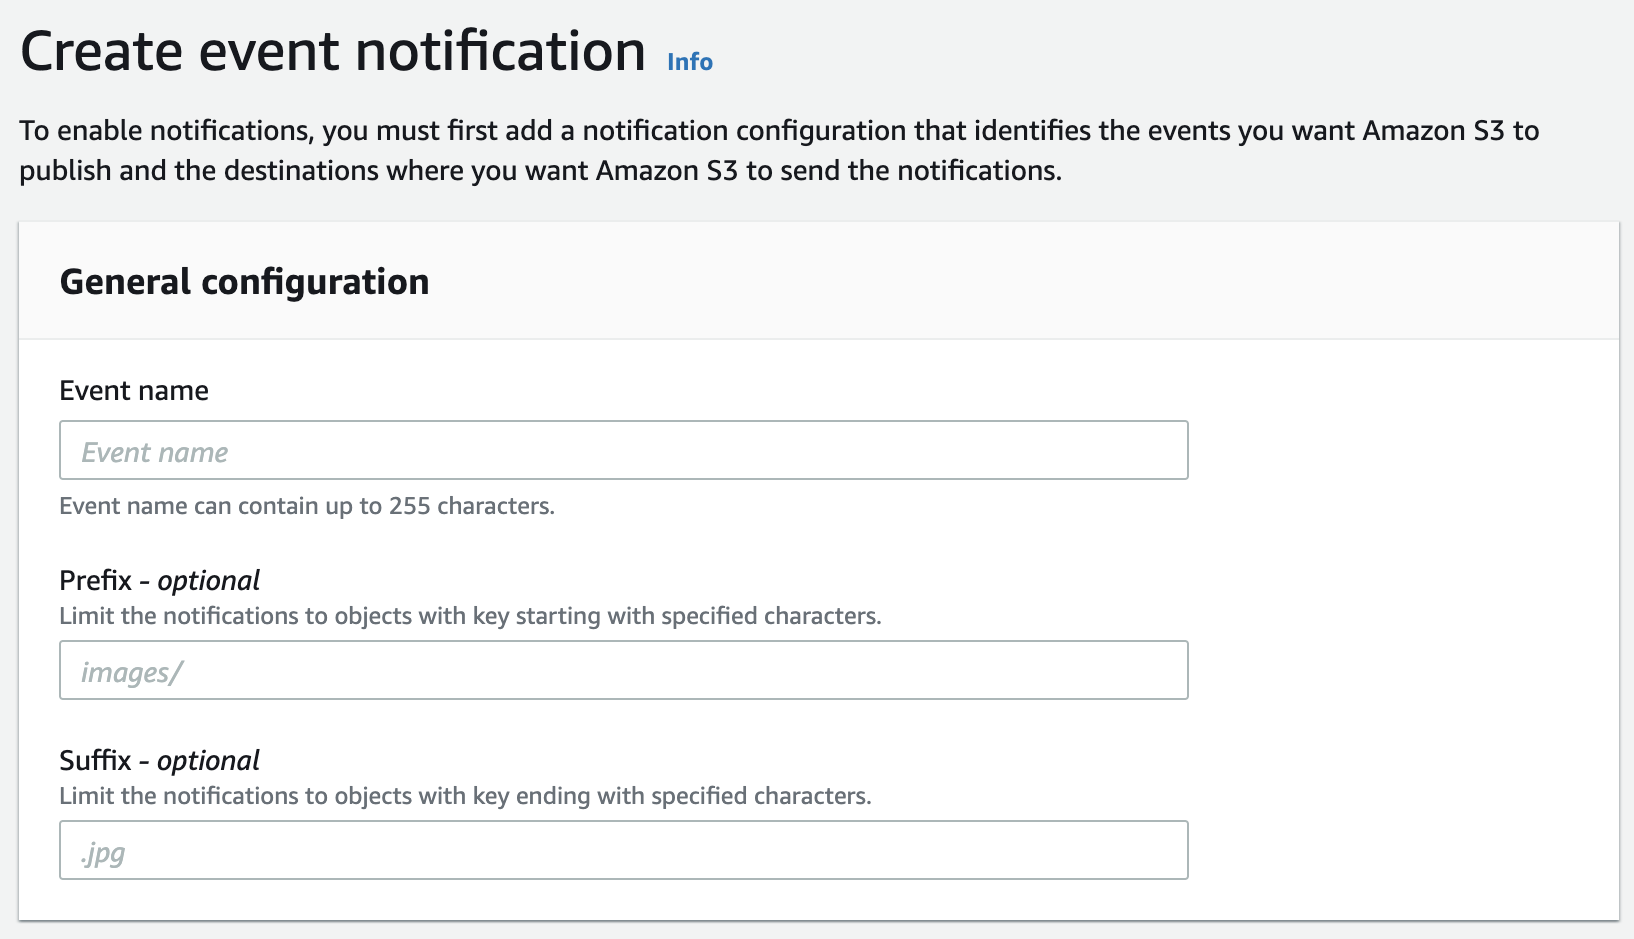
- Check the box to react to All object create events.

- Finally paste the Topic ARN that you got from Step 1 and click Save changes.
Step 3: Start uploading files to S3
You're done with setting up configuration. You can start uploading fastq files to S3, when you want a folder to be imported you need to upload/create an empty file called done inside that folder. Then go to your Gencove Project detail page and you'll see that your samples are being imported.
Let's see an example:
- Configure autoimport job for s3 uri
s3://bucket-name/human/project-A/ - Create a new folder for an assay
s3://bucket-name/human/project-A/assay-1/ - Upload
fastqfiles to new folders3://bucket-name/human/project-A/assay-1/SAMPLE1_R1.fastq.gzs3://bucket-name/human/project-A/assay-1/SAMPLE1_R2.fastq.gz- ...
- When you finish uploading your samples, create an empty file called
dones3://bucket-name/human/project-A/assay-1/done
- All the samples uploaded to
s3://bucket-name/human/project-A/assay-1/will be imported to Gencove project and analysed - If you want to import more files, you'll have to use a different folder as a given path is only processed once.
Importing samples with a CSV map file
A special fastq-map.csv file can be placed within any S3 prefix used for the S3 import feature (including S3 autoimports). This fastq-map.csv file allows for directly specifying the client ID of files within the S3 prefix, as well as concatenating files across lanes.
The FASTQ map file must:
- Be available within the same prefix as the FASTQ files to import
- Have the name
fastq-map.csv - Have the following 3 columns:
client_id,r_notation,pathclient_id: desired client ID for sampler_notation: acceptable values arer1andr2(case sensitive)path: filename under the current prefix e.g.reads_R1.fastq.gz
Example usage of fastq-map.csv
In the following example, we will describe usage of a fastq-map.csv file from an example S3 prefix s3://my-bucket/example/.
Listing the contents of the prefix, we see the following:
aws s3 ls s3://my-bucket/example/

2024-06-11 15:40:59          0
2024-06-11 15:46:10   16997831 reads1-1_R1.fastq.gz
2024-06-11 15:46:10   16997832 reads1-2_R1.fastq.gz
2024-06-11 15:46:10   17723748 reads1-1_R2.fastq.gz
2024-06-11 15:46:10   17723749 reads1-2_R2.fastq.gz
2024-06-11 15:46:10   16997832 reads2-1_R1.fastq.gz
2024-06-11 15:46:10   17723749 reads2-1_R2.fastq.gz
2024-06-11 15:46:10         39 fastq-map.csv
The file fastq-map.csv has the following contents:
client_id,r_notation,path
example1,r1,reads1-1_R1.fastq.gz
example1,r1,reads1-2_R1.fastq.gz
example1,r2,reads1-1_R2.fastq.gz
example1,r2,reads1-2_R2.fastq.gz
example2,r1,reads2-1_R1.fastq.gz
example2,r2,reads2-1_R2.fastq.gz
- When importing the prefix
s3://my-bucket/example/, thefastq-map.csvwill be automatically detected and parsed. - The entries in the CSV with the same
client_idandr_notationvalues will be automatically concatenated. e.g.reads1-1_R1.fastq.gzandreads1-2_R1.fastq.gzwill be concatenated into a new file, which is used as the R1 reads for the sample with client IDexample1. - No concatenation is needed for
example2, therefore only renaming will occur.
Note
Note that if the fastq-map.csv file is detected, any files not listed in the CSV will be ignored.
Common fastq-map.csv error modes
If the file is not named fastq-map.csv, or if the file is not present in the same prefix as the FASTQ files, the import will proceed with the standard S3 import process. This will cause R1/R2 file pairs to be imported as individual samples, without concatenation and with client IDs inferred through filenames.
When importing from S3 via the fastq-map.csv file, some common error modes may occur. In these cases, the import will be prevented and an error will be displayed through the Gencove web UI or CLI. Some common pitfalls to avoid include:
- the FASTQ files specified in the map are not located in the same prefix as the CSV file
- values in the
r_notationcolumn are notr1orr2 - the CSV file contains incorrect columns; the correct columns are
client_id,r_notation,path - entries are missing r1 files for a given
client_id; at a minimum, one r1 file must be present for eachclient_id
Happy analysis!